Moisture issues lead to 80% of flooring installation failures - fact!
Given this alarming statistic, we have put together a simple guide on how to go about conducting a moisture test on your sub floor to avoid having your fate in the hands of someone who doesn’t necessarily understand the significance of a suitably dry surface.
Moisture testing is not only required for new builds
Moisture in screeds is problematic for any moisture-sensitive type of flooring, such as vinyl, wood, ceramics, rubber and laminates, and too many stakeholders in the process deliberately plead ignorance in the event of a failure. Don’t be fooled into thinking that moisture is only a problem in a new build. We increasingly come across instances in old buildings that are being refurbished and even screeds that have previously been fitted with tiles, carpets or sheeting.
Moisture testing “Tools of the Trade”
To get you moisture testing like a Pro, you will need the right tools for the job. Here is what we recommend you keep in your toolbox:
-
- Moisture test liquid (available from Polyflor SA but not essential
-
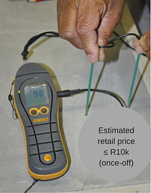
- Reliable moisture test meter such as a Protimeter or Wagner
-
- Good quality masonry or tungsten-tipped drill-bit
Tip: Mark your drill to the depth of the hole required.

How to moisture test for a perfect vinyl installation
Ensure you’re not leaving anything to chance by following this simple guideline:
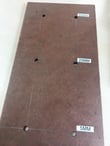 Drill 6 holes into the subfloor. Holes should be spaced as per the template guideline shown on the right. Ensure that the first two holes are each 5mm deep, the second two are 20mm deep and the last two 40mm deep.
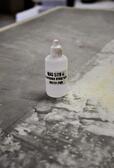 Place a few drops of moisture test liquid onto the dust from the holes. Wait at least 5 minutes after drilling as the heat from the drill motion affects the test as it could cause any moisture to evaporate. If the liquid turns purple it is a clear indicator of the area being wet and even more reason to conduct a thorough moisture test. The darker the colour, the more moisture present.
Remember: Conduct a moisture test well ahead of installation to ensure you have enough time to prepare your sub screed for installation.
 A Protimeter will provide you with a very accurate and reliable reading. Moisture is always more apparent deeper into the substrate and therefore important that you assess at a depth of 40%. Often a Protimeter is only brought in once the surface indicator shows moisture but we highly recommend you use this probe method from the outset.
a. Place each probe into the two holes drilled to 5mm depth and take a reading. Next, take a reading in the 20mm and 40mm deep holes.
b. Readings must register 18 and below.
.
Tip: Ensure the probes on the Protimeter are completely tight as this may affect your reading.
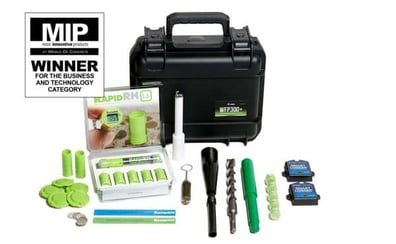
A Wagner meter requires a large hole to be drilled which is slightly trickier but the kit comes complete with drill and probe.
-
a. Place the probe into the hole and record the reading.
b. NB. Reading must be 75% RH and below.
c. The probe may be left in the sub screed to conduct moisture tests over a certain period of time. The latest wireless devices feature Bluetooth connectivity and can be paired to your smart device to automatically record ambient RH and temperature readings on-site while you’re away.
Tip: It is best to conduct moisture tests in random locations throughout the demarcated vinyl installation area.
- A surface test can be conducted with a Romus or Tramex but results are often not completely reliable. Should you use this method, use the classic method of placing a 1m x 1m piece of plastic floor sheeting and lay this on the area, sealing the edges with tape. Leave it for approximately one week to ensure any moisture in the sub screed has equalised. This will provide you with a more accurate reading. Ensure the meter is set to record a % H2O concrete reading (various options available to select) and slide the Romus or Tramex under the plastic to take the reading. An acceptable reading is 3 and below.
There are other moisture meters on the market but the above recommendation is Polyflor’s preferred method and has been tried and trusted over many years.
Tip: Be sure to record photographs of your moisture readings, with a date stamp, and document as proof and share with the project team.
Should your readings on any of the above indicate moisture, insist on a reputable moisture barrier before screed leveling.
Call the experts
Should this all sound too daunting just call in the experts. Polyflor’s technical team offer an added value service of conducting moisture tests on your behalf to provide you with peace of mind.
For more advice from our vinyl flooring specialists, why not download our latest eBook, Flooring contractor's guide: Developing and growing your business with vinyl flooring.
